基于swoole实现的实时聊天工具
发表于 · 归类于
代码 · 阅读完需 11 分钟 ·
阅读量 报告错误
前言
虽然网上有很多swoole实现的实时聊天工具,但是模仿起来还是遇到很多问题,以前已经实现过swoole的聊天室,现在把整个步骤写成一个文档。
1、搭建swoole环境要求
- Linux(CentOS 7.6)
- PHP (PHP 7.3)
- swoole (swoole4.3.4)
安装PHP(略)
安装swoole
2、编写前端页面
.bottom{
    position: absolute;
    z-index: 100;
    width: 98%;
    height: 56px;
    bottom: 0;
    left: 0;
    display: inline-block;
}
3、写js脚本实现websocket连接
var socket_url = "ws://www.xxxx.cn:9502";
var ws; //连接
var nick = "用户昵称";
var online = 0;// 在线状态
$(function(){
// 直接连接
ws = new WebSocket(socket_url);
ws.onopen = function() {
online = 1;
console.log('<p>连接服务器成功。</p>');
};
ws.onmessage = function(e) {
let rec = JSON.parse(e.data);
let time =new Date();
if(rec && rec.name && rec.content){
$("#sockmsg").append('<li>'+
'<span class="name">'+rec.name+'</span>: <br>'+
'<span class="content">'+rec.content+'</span>'+
'</li>');
}else{
$("#sockmsg").append('<span class="color-s">系统消息 '+time.toLocaleString()+'</span><p>'+e.data+'</p>');
}
};
ws.onclose = function()
{
online = 0;
alert('您已离线');
};
// 发送消息
$("#send").on("click",function(){
var content = $.trim($("#content").val());
if(content && nick && online == 1){
var param = {};
param.content = content;
param.name = nick;
console.log('发送消息:'+JSON.stringify(param));
$("#content").val('');
$("#sockmsg").append('<li>'+
'<span class="name me">'+nick+'</span>: <br>'+
'<span class="content">'+content+'</span>'+
'</li>');
ws.send(JSON.stringify(param));
}else{
alert('您已掉线');
}
})
});
4、联合swoole开发调试
swoole程序代码
$server = new \swoole_websocket_server("0.0.0.0", 9501);

$server->on('open', function($server, $req) {

});

$server->on('message', function($server, $frame) {
    $receive = json_decode($frame->data,true);

    foreach ($server->connections as $fd) {
        if ($server->isEstablished($fd) && $fd != $frame->fd) {
            $server->push($fd, json_encode($receive));
        }
    }
});

$server->on('close', function($server, $fd) {

});

$server->start();
运行:nohup php demo.php &
5、配置wss连接
使用Nginx代理websocket连接,即可使https站点支持wss连接,操作方法如下:
1、配置Nginx代理socket接口
server
    {
        listen 443 ssl http2;
        #listen [::]:443 ssl http2;
        server_name www.websocket.com;
        index index.html index.htm index.php default.html default.htm default.php;
        root  /home/www/web/public/;
        # 配置ssl证书代码
        location /websocket {
            proxy_pass http://127.0.0.1:9501;
            proxy_set_header X-Real-IP $remote_addr;
            proxy_read_timeout 600;
            proxy_set_header Host $host;
            proxy_set_header X-Forwarded-For $proxy_add_x_forwarded_for;
            proxy_http_version 1.1;
            proxy_set_header Upgrade $http_upgrade;
            proxy_set_header Connection "upgrade";
        }
    }
2、连接地址如下
wss://www.websocket.com/websocket
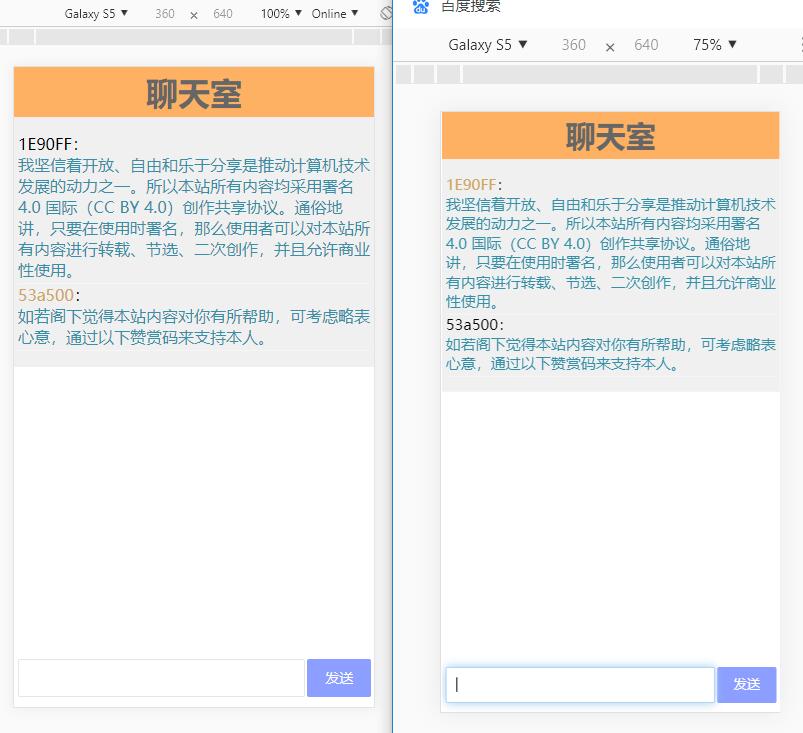
6、多终端测试


7、线上运行跟踪
本系统已正常运行一个周(从开始运行到现在已经一个周啦)
[root@aliecs websocket]# ps aux|grep think
root     14023  0.0  0.7 340596 14496 ?        S    19:40   0:00 php think ws6
root     15539  0.0  2.2 405928 43252 ?        Sl   Jun11   0:09 php think ws6
root     15549  0.0  0.5 333956 10516 ?        S    Jun11   0:00 php think ws6
root     15583  0.0  0.7 338412 14208 ?        S    20:05   0:00 php think ws
root     32593  0.0  2.4 405928 46024 ?        Sl   15:55   0:00 php think ws
root     32603  0.0  0.5 333956 10588 ?        S    15:55   0:00 php think ws
[root@aliecs websocket]#
8、项目扩展
- 对该系统新增禁言功能;
- 添加用户头像显示;
- 增加图片发送和显示;
- 记录并重新显示聊天记录。