OpenResty
发表于 · 归类于
技术 · 阅读完需 7 分钟 ·
阅读量 报告错误
简介
OpenResty® 是一个基于 Nginx 与 Lua 的高性能 Web 平台,其内部集成了大量精良的 Lua 库、第三方模块以及大多数的依赖项。用于方便地搭建能够处理超高并发、扩展性极高的动态 Web 应用、Web 服务和动态网关。最新版:OpenResty 1.15.8.1
一、安装
yum install yum-utils -y

yum-config-manager --add-repo https://openresty.org/package/centos/openresty.repo

yum install openresty -y

yum install openresty-resty -y
二、HelloWorld
方式1:内嵌lua
location /lua
{
    default_type text/html;
    content_by_lua 'ngx.say("<p>Hello,科帮网</p>")';
}
方式2:引入lua
location /lua
{
    default_type text/html;
    content_by_lua_file conf/lua/hello.lua;
}
conf/lua/hello.lua的路径为/usr/local/openresty/nginx/conf/lua/hello.lua,内容为ngx.say("hello world")
三、Redis连接
1)首先配置redis,密码为空,redis数据存入任意数据
127.0.0.1:6379> set foo "openresty"
OK
127.0.0.1:6379> get foo
"openresty"
2)配置lua读取redis内容
local redis = require "resty.redis"
local cache = redis.new()
cache.connect(cache, '127.0.0.1', '6379')
local res = cache:get("foo")
if res==ngx.null then
    ngx.say("This is Null")
    return
end
ngx.say(res)
3)配置Nginx引入lua文件
location /redis {
    default_type text/html;
    content_by_lua_file conf/lua/redis.lua;
}
4)浏览器访问查看效果 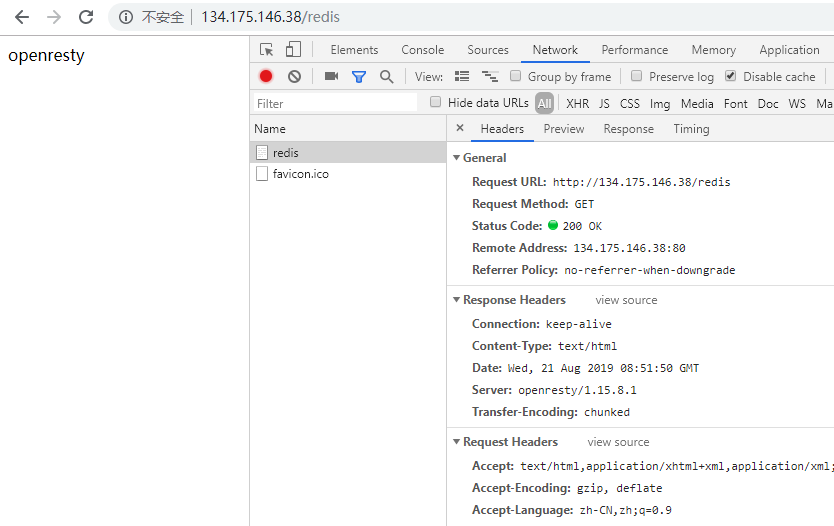
四、代码解读
1)引入包
openresty的安装路径为:/usr/local/openresty
lua库的路径为:/usr/local/openresty/lualib
当require "resty.redis"时实际上是引用了/usr/local/openresty/lualib/resty/redis.lua文件
2)获取HTTP头部
local headers=ngx.req.get_headers()
ngx.say(headers["X_FORWARDED_FOR"])
3)获取Nginx的参数
location /lua {
    set $test "hello, world.";
    content_by_lua '
        ngx.header.content_type = "text/plain";
        ngx.say(ngx.var.test);
    ';
}
local ip = ngx.var.remote_addr
4)json转化
local cjson = require "cjson"
local headers=ngx.req.get_headers()
local json = cjson.encode(headers)
输出(格式化后):
{
    "host":"134.175.146.38",
    "connection":"keep-alive",
    "upgrade-insecure-requests":"1",
    "cache-control":"no-cache",
    "pragma":"no-cache",
    "user-agent":"Mozilla/5.0 (Windows NT 10.0; WOW64) AppleWebKit/537.36 (KHTML, like Gecko) Chrome/69.0.3497.100 Safari/537.36",
    "accept-language":"zh-CN,zh;q=0.9,en;q=0.8,ja;q=0.7",
    "accept-encoding":"gzip, deflate",
    "accept":"text/html,application/xhtml+xml,application/xml;q=0.9,image/webp,image/apng,*/*;q=0.8"
}
五、实验一:基于IP统计访问次数
1)在Nginx的http里面分配lua的内存空间
lua_shared_dict limit 10m;
local ip = ngx.var.binary_remote_addr
local limit = ngx.shared.limit
local req,_=limit:get(ip)
if req then
        limit:incr(ip,1)
        if req > 20 then
        		ngx.say("this ip request over 20 times is: ",req)
        else
                ngx.say("this ip request times : ",req+1)
        end
else
        limit:set(ip,1,10)
        ngx.say("this ip first times to request.")
end
- 注意:limit:set(ip,1,10)的意思是设置ip=1,有效期为10秒钟;
- 做cc防攻击可以设置ngx.exit(403)
实验结果:(注意如果到下一分钟,计数器归零)

六、实验二:GeoIP的使用
(未完成)
参考文档
安装文档